

This lesson is made with PSPX9
But is good with other versions.
© by SvC-Design
.gif)
Materialen Download :
Here
******************************************************************
Materials:
166_Femme_Page6_Animabelle.png
262_animabelle_tubes_animaux.png
263_animabelle_tubes_animaux.png
a36.jpg
aditascreations_mask_43.jpg
Dégradé_Photocat_Animabelle.grd
photo_cat_animabelle.PspSelection
photo_cat1_animabelle.PspSelection
photo_cat2_animabelle.PspSelection
******************************************************************
Plugin:
Plugins - MuRa's Meister - Cloud
Plugins - Filter Factory Galery Q - Mosaic
Plugin - AAA Filters - Custom - Kirsch
Plugins - MuRa's Meister - Perspective Tiling
Plugins - <I.C.NET Software> - Filters Unlimited 2.0
Plugn - Filter Factory Gallery T - Grain Maker
Plugins - AAA Frames - FOTO FRAME
Plugins - Alien Skin Eye Candy 5: Impact - Glass
******************************************************************
color palette
:

******************************************************************
methode
When using other tubes and colors, the mixing mode and / or layer coverage may differ
******************************************************************
General Preparations:
First install your filters for your PSP!
Masks: Save to your mask folder in PSP, unless noted otherwise
Texture & Pattern: Save to your Texture Folder in PSP
Selections: Save to your folder Selections in PSP
Open your tubes in PSP
******************************************************************
We will start - Have fun!
Remember to save your work on a regular basis
******************************************************************
1.
Open a new transparent image of 900 x 600 pixels
Fill it with color 1
Layers - New raster layer
Fill it with color 2
Layers - New Mask Layer - From Image –
aditascreations_mask_43.jpg

Layers - Merge - Merge group
Effects - Edge Effects - Enhance
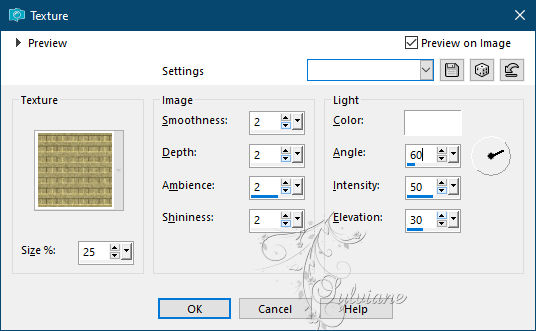
Effects - Texture effects - Apply texture "a36"
Effects - 3D effect - Drop shadow
5/5/100/15 - color: # 000000
2.
Layers - New raster layer
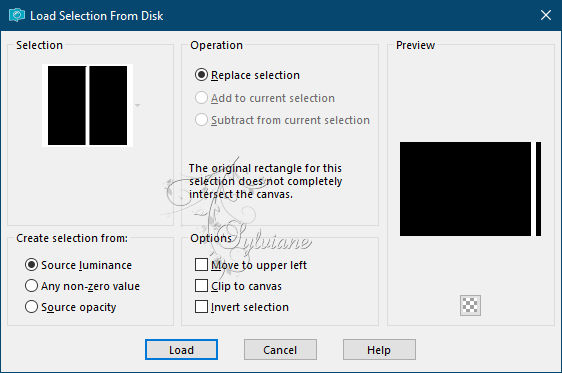
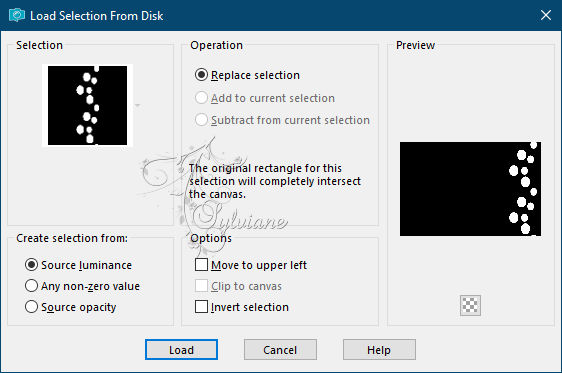
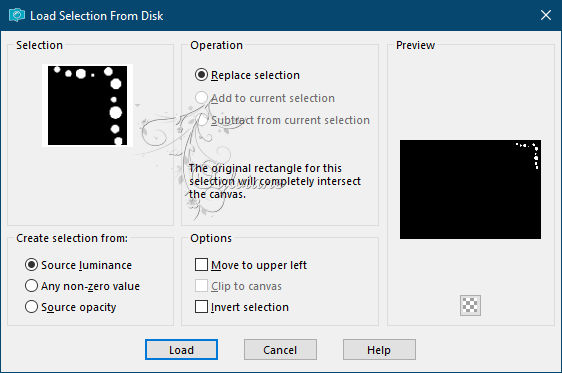
Selections - Load / Save - Load selection from disk -
photo_cat_animabelle.PspSelection
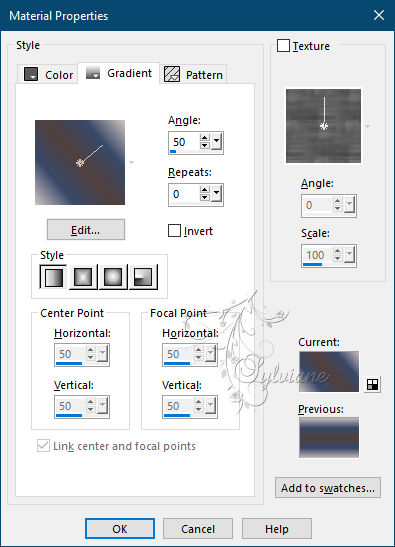
Fill the selection with the following linear gradient, made up of the 3 basic colors
(see my tutorial => to change the colors and put yours "
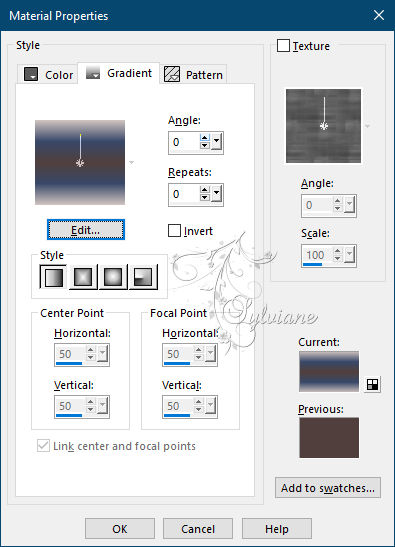
Click on "Import" and go look for the gradient in the material if you don't see it
after putting it in your PSP gradients

Selection - Select None
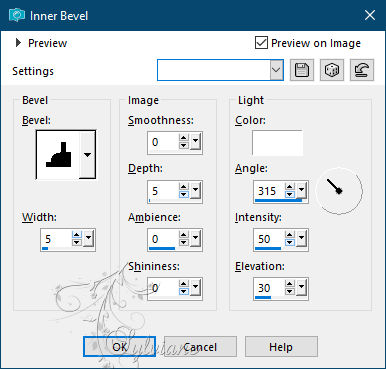
Effects – 3D effects – inner bevel
3.
Layers - Duplicate
Activate the bottom layer "Raster 2"
Effects - Distortion effect - Wind
To the right - Intensity at 70
Blend mode on "Overlay"
Layers - Duplicate
Image - Mirror – mirror Horizontal
Go back to the top layer "Copy of Raster 2"
Layers - Duplicate
Image - Mirror – mirror Horizontal
Layers - Merge - Merge visible layers
4.
Layers - New raster layer
Selections - Load / Save - Load selection from disk - photo_cat1_animabelle.PspSelection
Fill the selection with the following linear gradient
Effects - Texture effect - Texture
(same previous settings)
Adjust – scharpness – scharpen
Selection - Select None
Effects - 3D effect - Drop shadow
5/5/60/15 color:#000000
5.
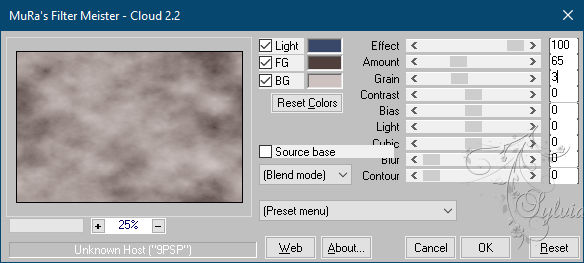
Layers - New raster layer
Plugins - MuRa's Meister - Cloud
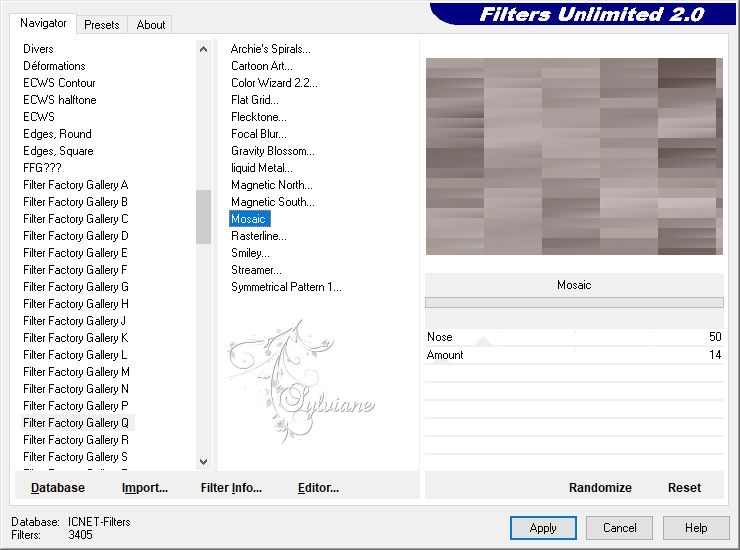
Plugins - Filter Factory Galery Q - Mosaic
Plugin - AAA Filters - Custom - Kirsch
Check the "Normal" box

Plugins - MuRa's Meister - Perspective Tiling
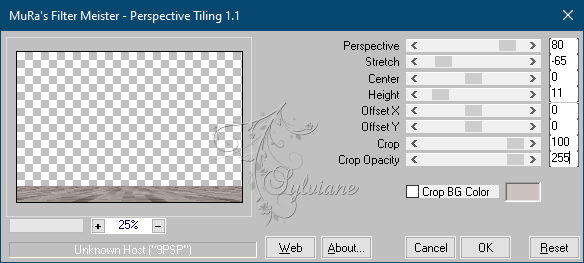
6.
Open 263_animabelle_tubes_animaux.png
(After removing the watermark)
Edit – Copy
Edit - Paste as new layer
Image - Resize to 40%
(resize all layers: unchecked)
Adjust – scharpness – scharpen
Place the tube at the bottom left (see final result)
Effects - 3D effect - Drop shadow
(- 5) / 12/50/30 color:#000000
7.
Open 262_animabelle_tubes_animaux.png
(After removing the watermark)
Edit – Copy
Edit - Paste as new layer
Image - Resize to 45%
(resize all layers: unchecked)
Place the tube on the white cabinet on the left (see final result)
Effects - 3D effect - Drop shadow
(- 5) / 12/50/30 color:#000000
8.
Selections - Select all
Image - Add Borders - symmetrical borders of 4 pixels color 3
Selections - Invert
Effects – 3D effects – inner bevel
(same previous settings)
Selections - Select all
Image - Add Borders - 60 pixels - color 2
Selections - Invert
Fill the selection with the previous linear gradient
Selections - Convert selection to layer
9.
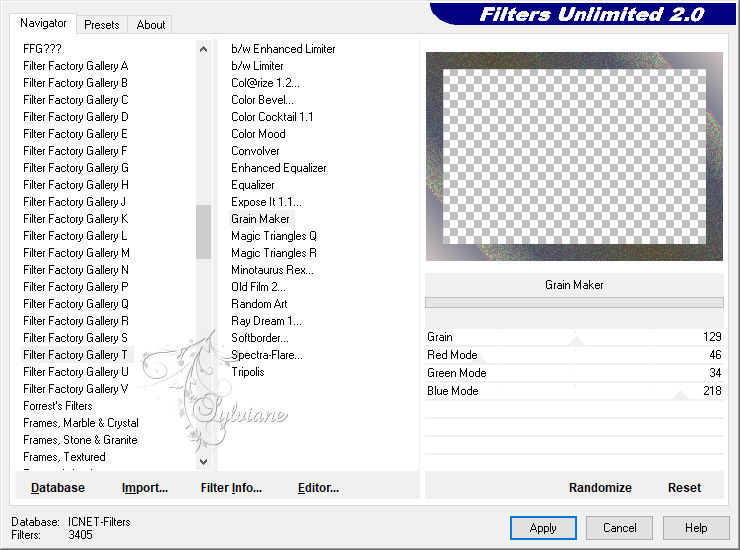
Plugins - <I.C.NET Software> - Filters Unlimited 2.0
Plugn - Filter Factory Gallery T - Grain Maker
(default settings)
Selection - Select None
Blendmode: Luminance (legacy)
Layer – merge – merge all (flatten)
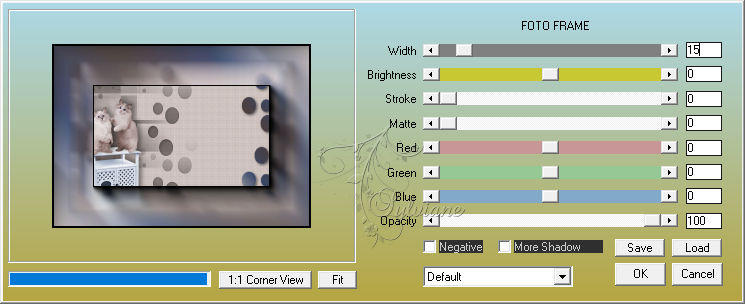
Plugins - AAA Frames - FOTO FRAME
10.
Layers - New raster layer
Selections - Load / Save - Load selection from disk - photo_cat2_animabelle.PspSelection
Fill the selection with the previous linear gradient
Effects - Texture effect - Texture
(same previous settings)
Adjust – scharpness – scharpen more
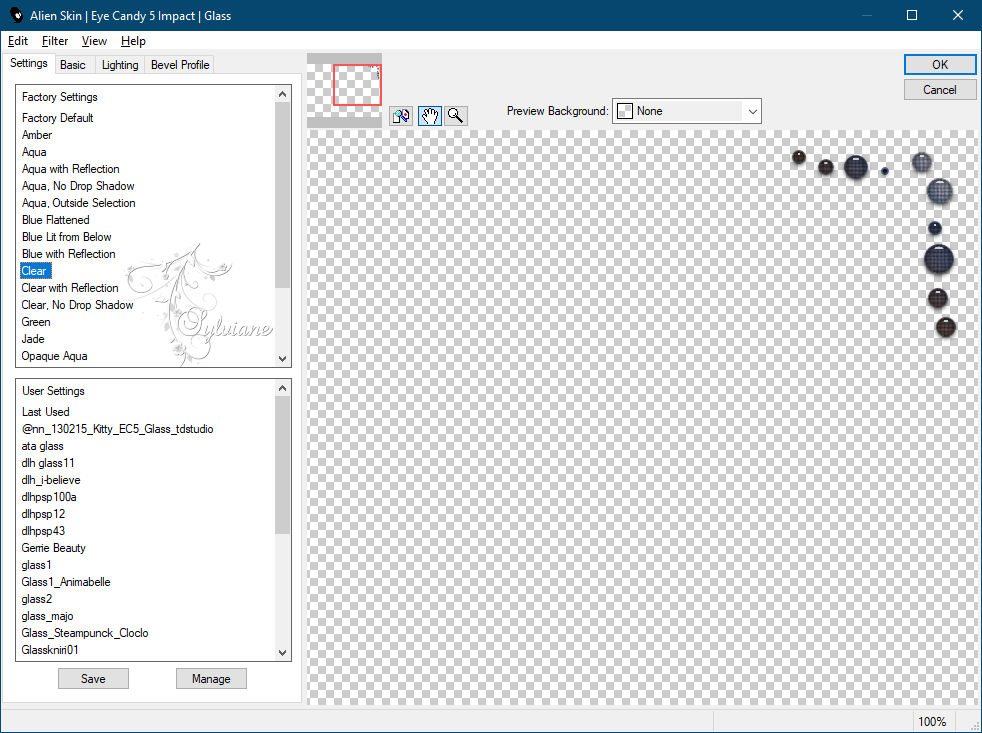
Plugins - Alien Skin Eye Candy 5: Impact - Glass
"Clear"
Selection - Select None
Layers - Duplicate
Image - Mirror – mirror Horizontal
Image - Mirror - Vertical Mirror
11.
Open 166_Femme_Page6_Animabelle.png
(After removing the watermark)
Edit – Copy
Edit - Paste as new layer
Image - Resize to 85%
(resize all layers: unchecked)
Place the tube on the right (see final result)
Effects - 3D effect - Drop shadow
0/0/70/50 – color:#000000
12.
Selections - Select all
Layers - New raster layer
Fill it with color 1
Selection - modify - contract -1 pixel
Edit - Cut or Delete. with the key on your keyboard
Selection - Select None
13.
Layers - New raster layer
Apply your watermark (Signature)
Layer – merge – merge all (flatten)
Image - Resize to 900 pixels wide
Save as JPEG
Back
Copyright Translation © 2021 by SvC-Design